These are the steps for adding a departmental printer to your machine running Ubuntu.
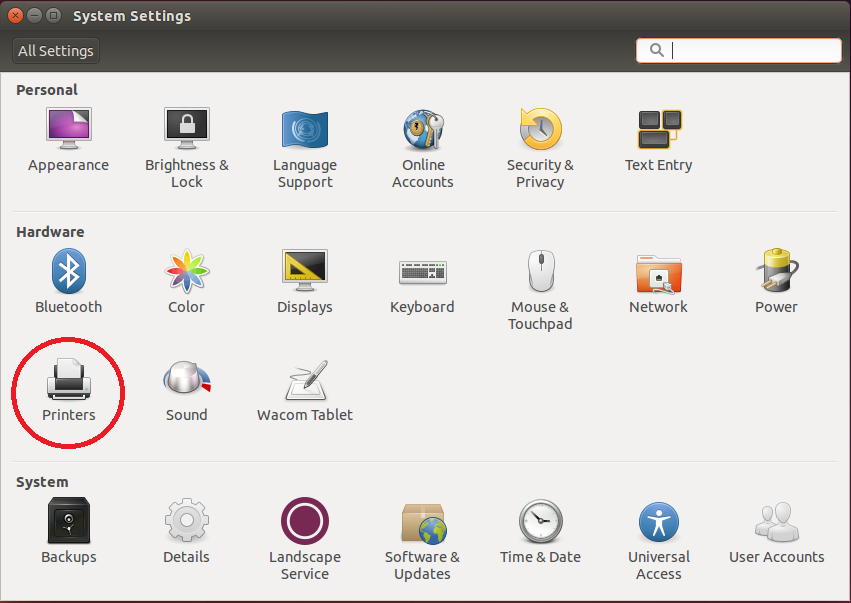
Open System Settings and select "Printers"
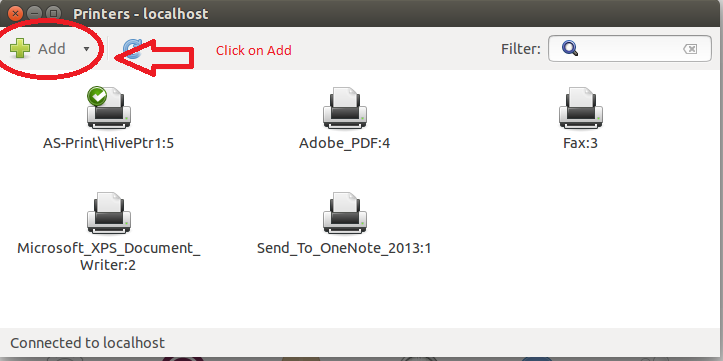
Add a Printer
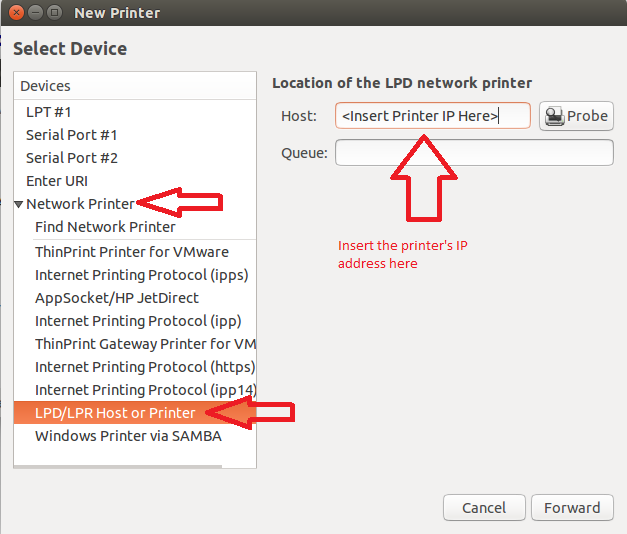
Select Device
Select "Network Printer" then "LDP/LPR Host or Printer" then type in the printer's IP address.
Driver Installation
The printer driver should automatically be installed. If it does not automatically install, select your printer driver from the list.
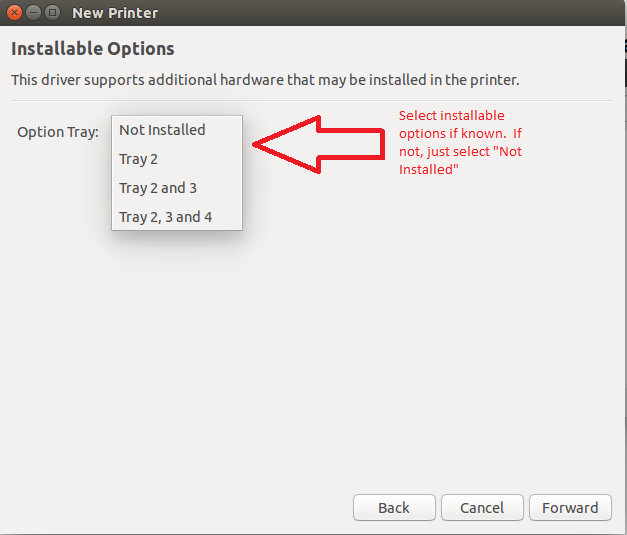
Installable Options
Select any options that are installed on the printer. If you do not know, select "Not Installed".
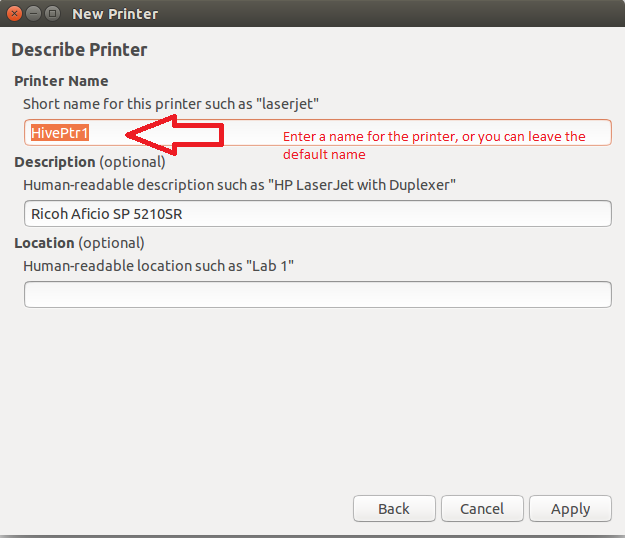
Rename the Printer
You can keep the default name or change it to whatever you would like.
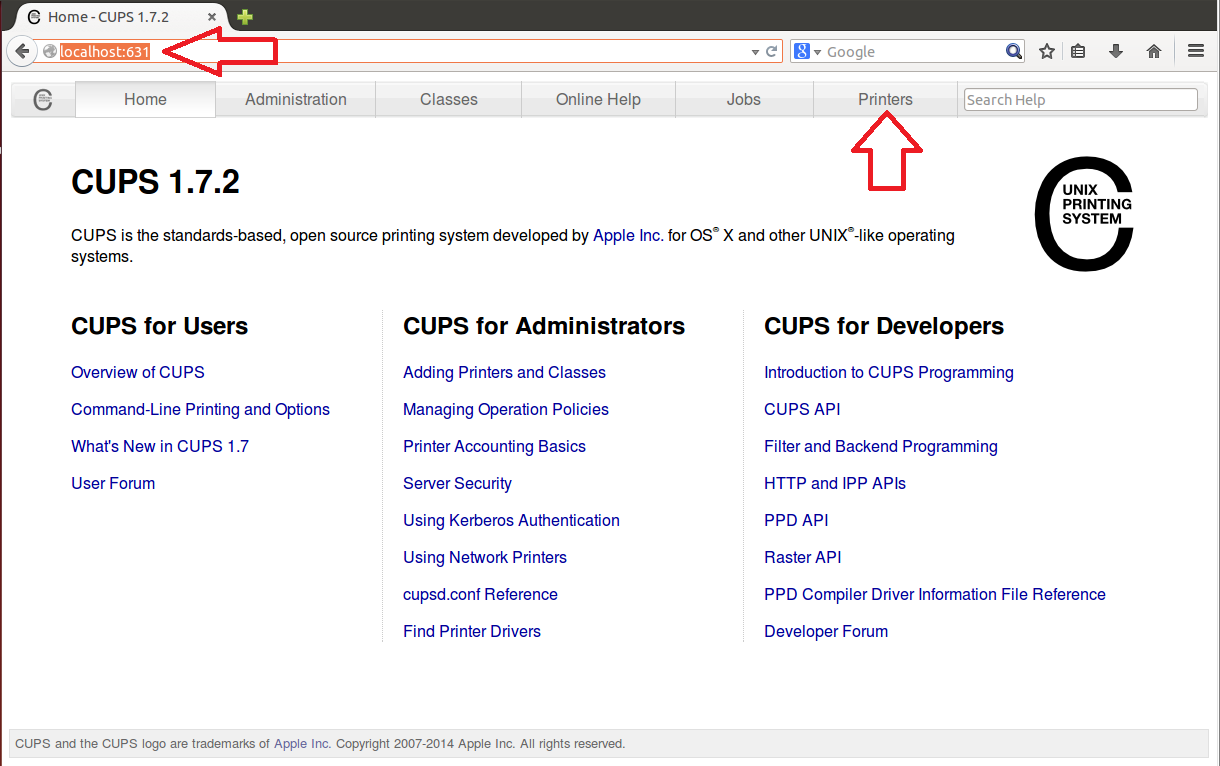
Navigate to CUPS
Open up a web browser. In the address bar type "localhost:631". This will bring up the CUPS homepage, then click on "Printers".
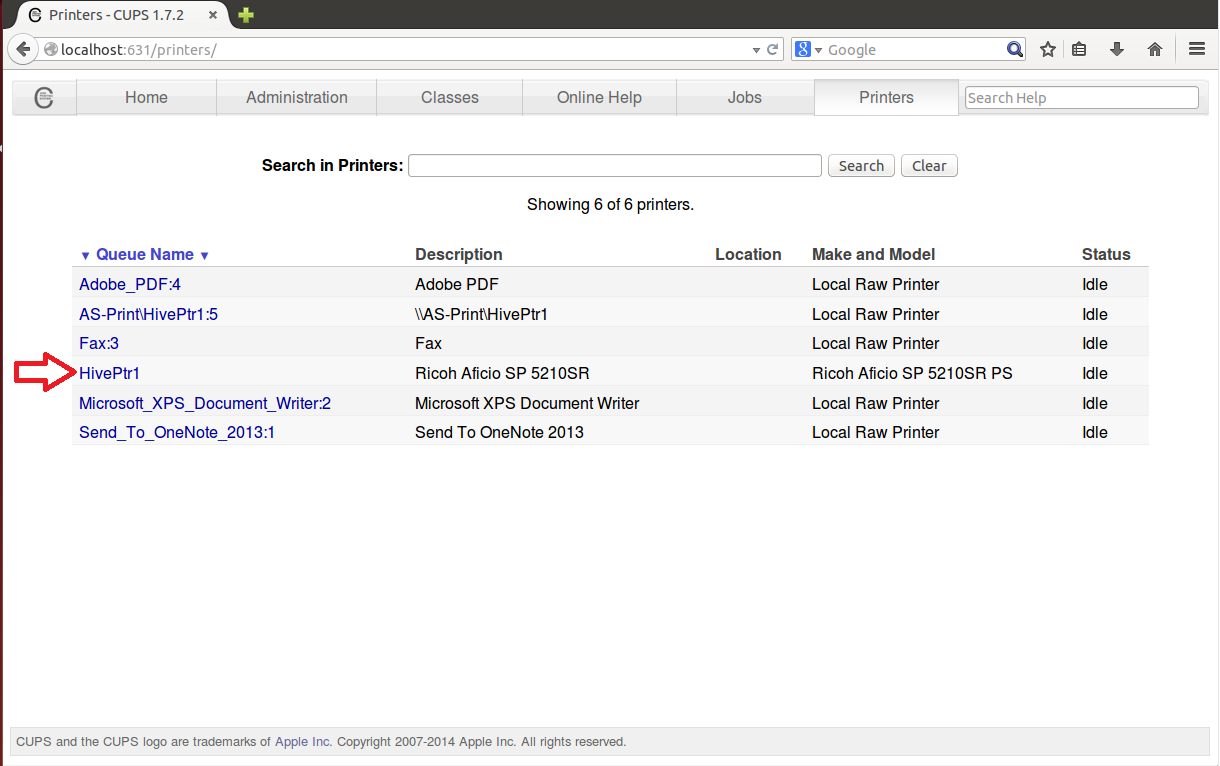
Select Printer
Select the printer that you just added to change it's options.
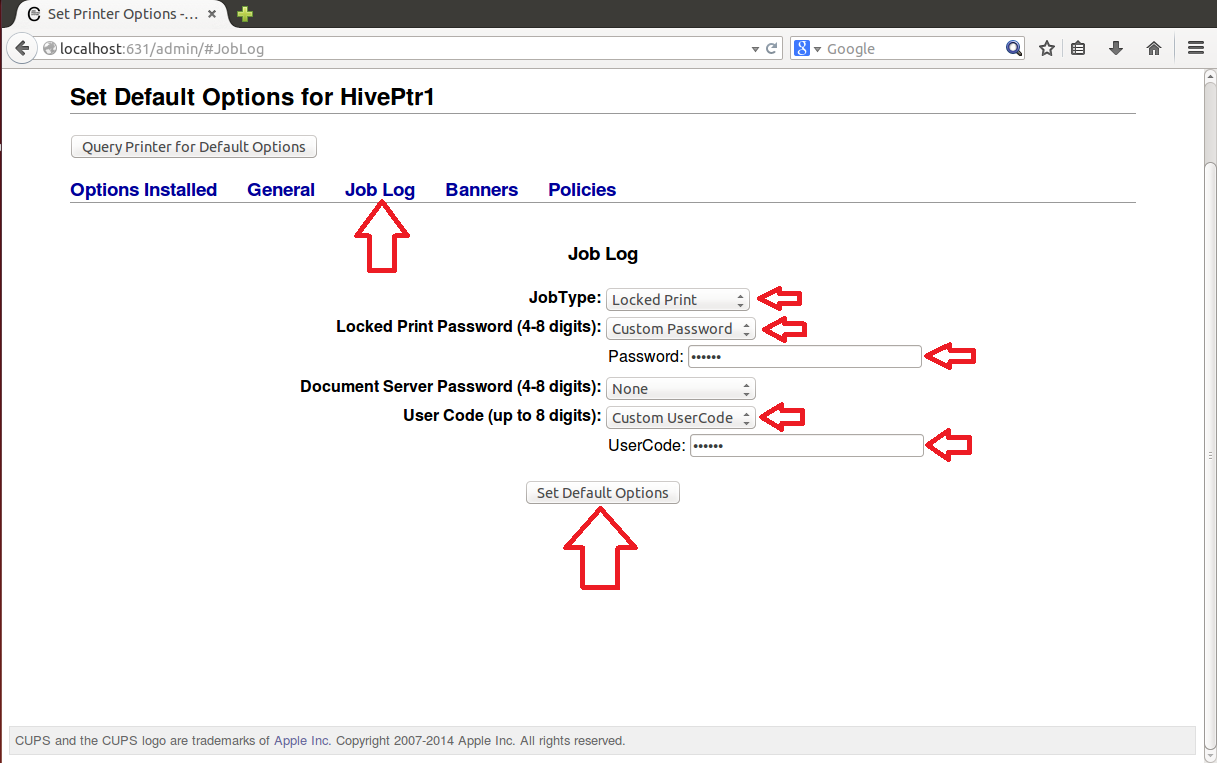
Set Default Options
Click on "Job Log". Change the job type to "Locked Print", Locked Print Password to "Custom Password" and enter your code for the copier. Change User Code to "Custom UserCode" and enter your code for the copier again. Finally click "Set Default Options".