
Intended audience:
All users
Authenticated users (logged in)
Steps:
1.
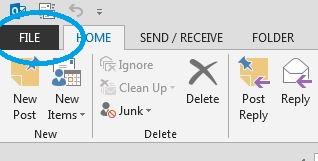
In Outlook, click on File.
2.
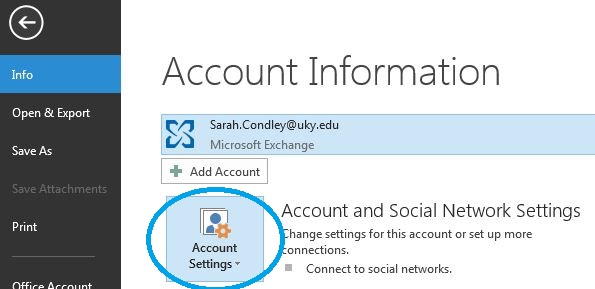
You should automatically be on the Info menu. Click on Account Settings.
3.
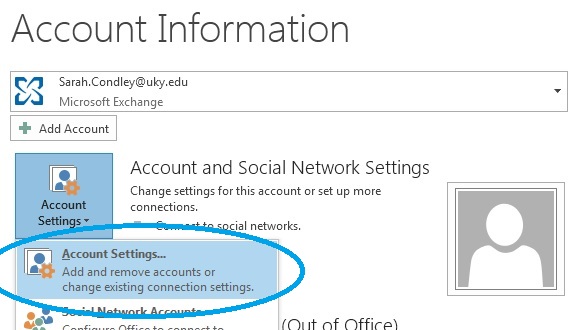
In the dropdown, choose Account Settings again.
4.
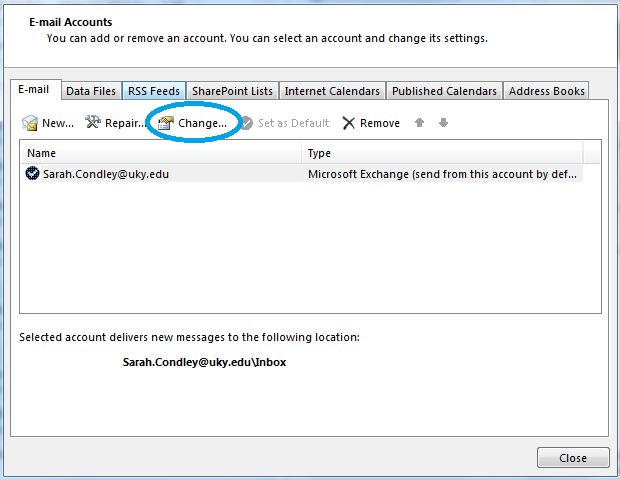
You'll see your Exchange Account listed. Click Change...
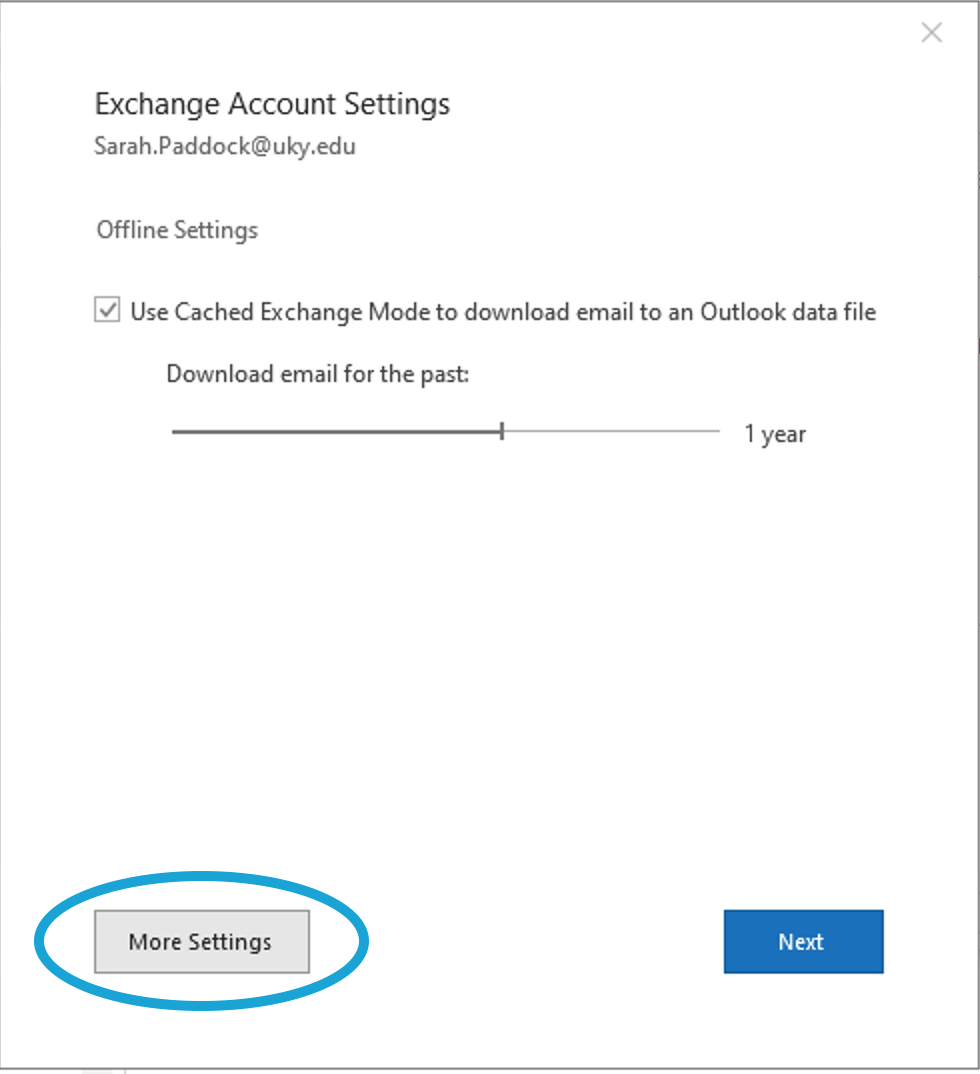
5.
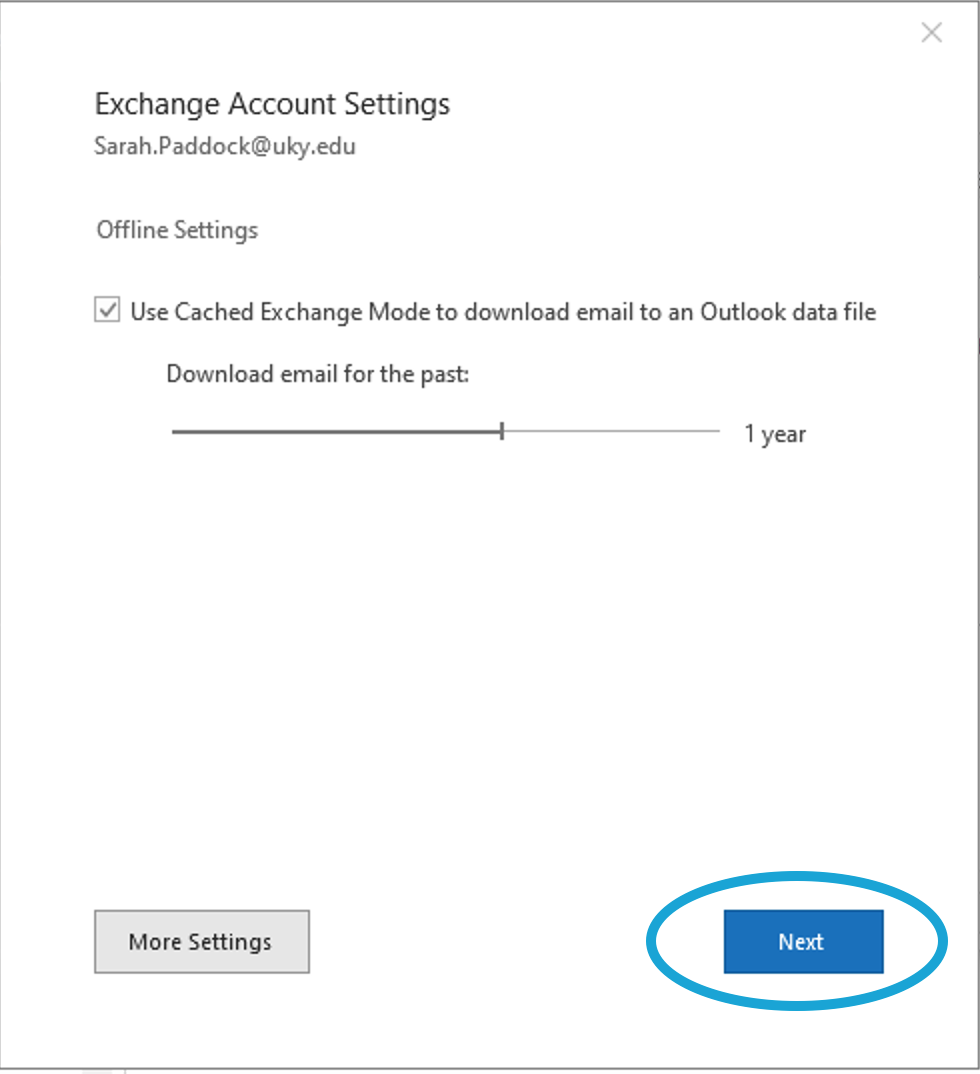
Click on More Settings...
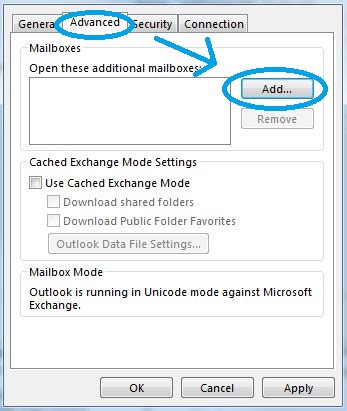
6.
Go to the Advanced tab, and click Add...
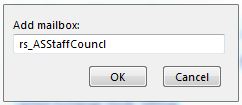
7.
Type in the name of your resource mailbox, and click OK.
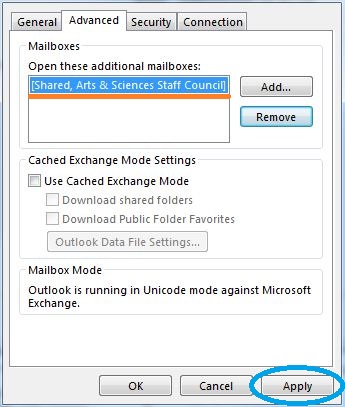
8.
You should see your mailbox listed. Click Apply
9.
Click Next and Finish.
Category: